Blog
Stories from my personal journey learning about and delivering Nature-rooted programs across three different countries
Starting a Forest School program from scratch: Part 4
Caylin (Forest Schooled)

Empty space, drag to resize
Preface: I've called the first post in this series "Part 1", but a friend reminded me that there is so much more that comes before this part of starting a Forest School program. The Forest School training I completed a couple of years ago and the ongoing research, discussion, and reflection around the Forest School ethos I've done since then has really been my "Part 1." This was and continues to be the crucial part that helps me appreciate the deep meaning and purpose within Forest School pedagogy (please read Forest School as a mindset... as well as a set of activities for more about this). This series, Starting a Forest School Program from Scratch, is not intended to be a guide or short cut for others to follow, because there is no such thing. My intention is rather to continue sharing my own journey in the hopes that it might resonate with and support others on their Forest School journeys too.
With love,
Forest Schooled

Well, here we are at Part 4 and I'm happy to say that the first program has been running for 2 weeks now! It may still be early days, but that certainly feels like an accomplishment. (Check out part 1, part 2, and part 3 if you need to catch up with what's been done to get to this point). In part 3, I shared templates for the documents that form the foundations for starting a program like this, including Risk Assessments, Ecological Impact Assessment, and Policies & Procedures. This isn't necessary the "fun" part of the planning stages (at least for me), but it is of course necessary. Now, in part 4, I'd like to share some of the more exciting parts of planning a program, including actually getting to deliver it!
A couple of weeks before the first session I started scouring my local thrift shops for items I could use for Forest School. In one shop I found a shelf where everything on it was 25 cents and it felt like a gold mine. I got the majority of my equipment and resources from these thrift hunts, though I did end up splurging on a new Kelly Kettle ($80) since I don't have the ability to have a permanent fire site at the location I'm working at. A Kelly Kettle makes it easy to have a fire anywhere and boil water for hot chocolate and tea all in one. I also purchased a new set of fire steels ($12). The rest of the thrift store items combined cost me all of $18 total.. what a score! Check out my new (well not all new, but new to me!) Forest School kit in the photo below:
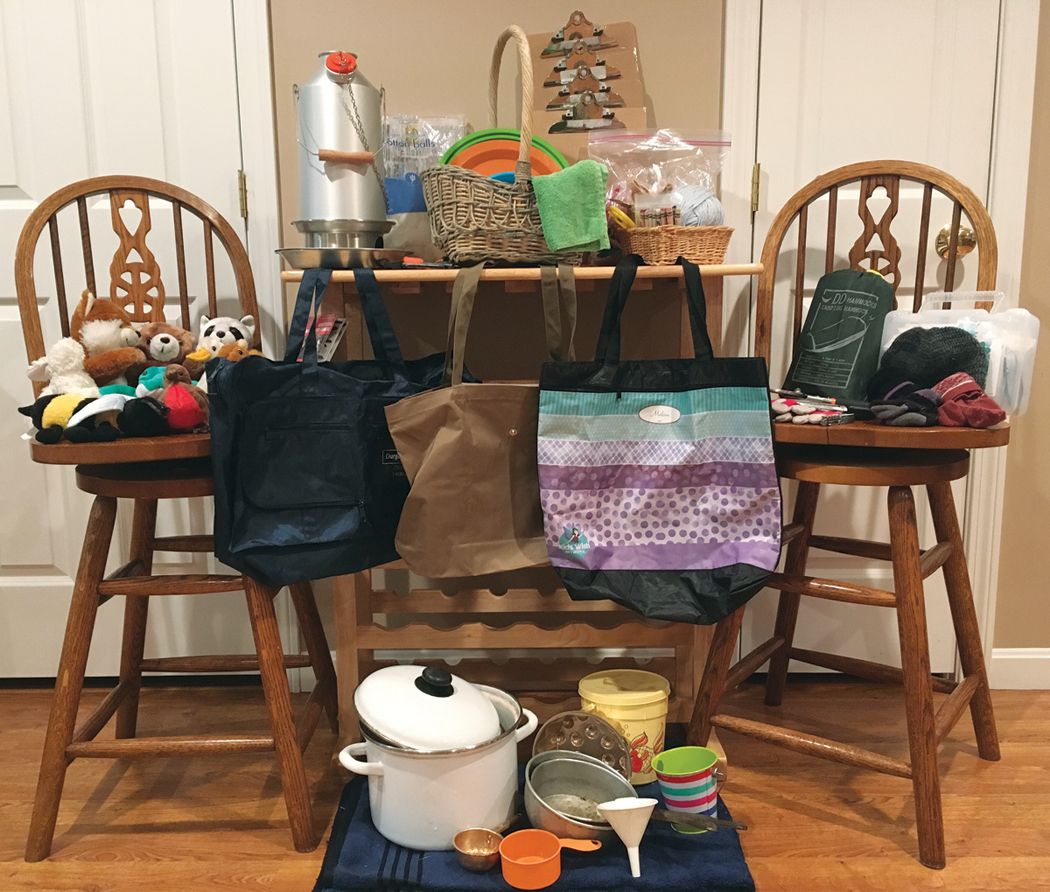
(Note: The First Aid Kit in the photo is an up-to-date one that I already had.. I didn't pick that up at a thrift store, don't worry!)
Next came handling bookings. The organization I've partnered with has an online booking system where parents can register their children and pay for the program all at once. Once they booked I sent the parents a confirmation email that had 2 attachments, One was a Parental Consent Form requesting emergency contact and medical information and the other was a Parent Information Pack that included the following information:
- Program description
- About me section (since I hadn't met any of the parents before)
- Locations and times for dropping off and picking up children
- What clothing their children should wear to the program
- Health and Safety blurb with a brief description of risky play
- Policies around food (sending children with their own snacks and communicating with me about any allergies/restrictions)
- Behavior policy
- Photography policy
- Cancellation policy
- Contact information for me and the partnering organization
After bookings, I got to move on to the really fun part - planning the first session! I used a planning form that is a mismatch of something a former colleague of mine used and other planning forms I've seen elsewhere. I've also added my own tweaks to tailor it to something that works really well for me. It includes both planning & post-session evaluation elements in it. You can download the template below and feel free to use it as is or use parts of it if you want to tweak it to make something of your own too!
Session Plan Template (PDF Version)
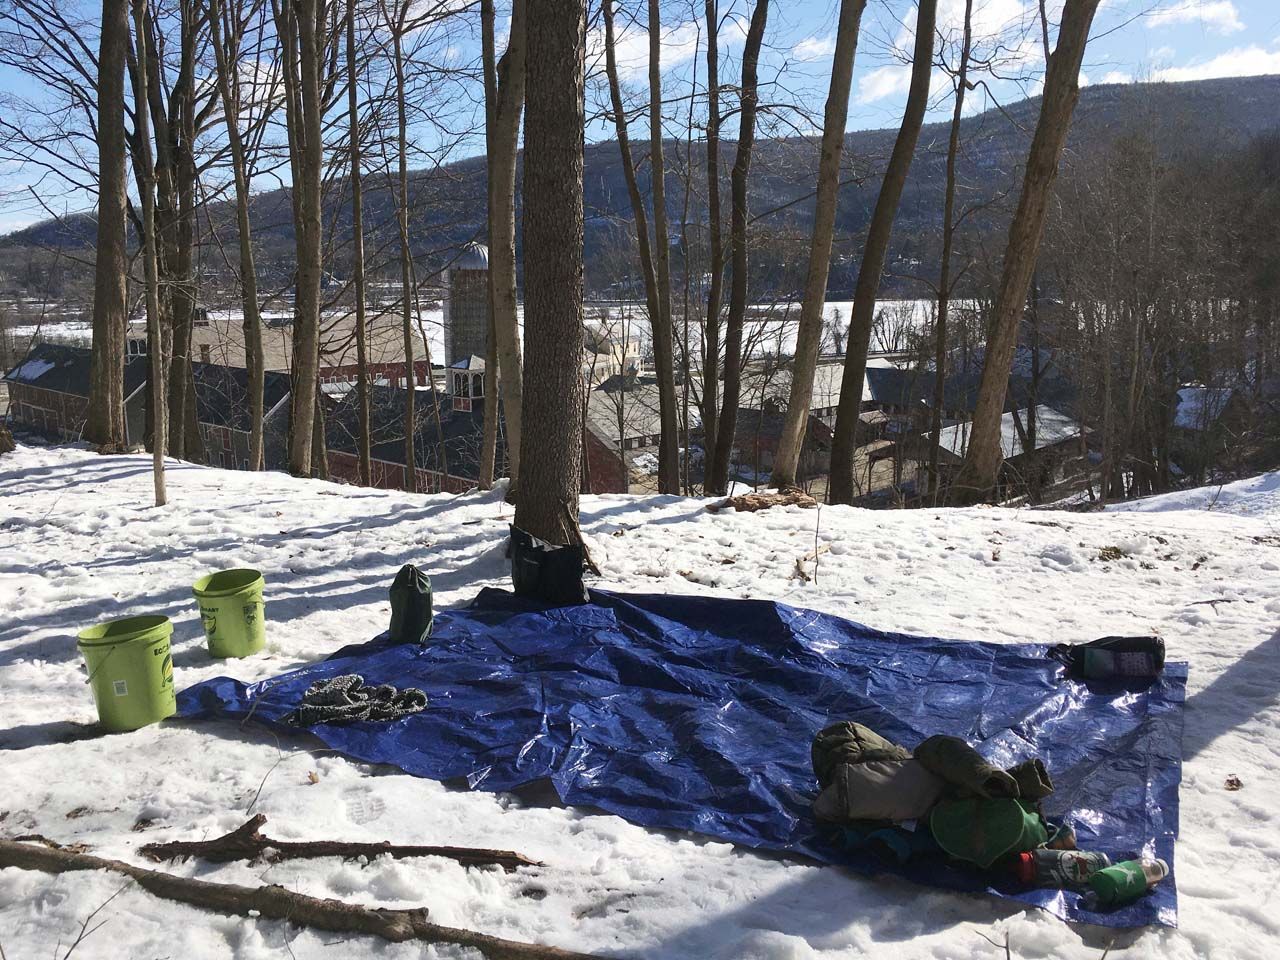
Before the start of the program I only made a plan for the very first session. I waited to plan the second session until after the first session had happened. Then I used my observations as well as what the children said they were interested in during that first session. Now that we've just had our second session, I'm using those observations and the children's feedback to plan for the third one next week. So far swings, making shelters, balancing on logs, and building fairy houses have been popular. We also just started to introduce fire and made some delicious pine needle tea, so I can see us building off of those skills as the program progresses.
Well, I hope that this series of Starting a Forest School program from scratch has been helpful or at least interesting to some of you! I haven't decided whether there will be a Part 5 to this series yet... so we'll see about that. I want to again mention that the Level 3 Forest School Practitioner training I undertook a couple of years ago (along with Outdoor First Aid training too!) are what built the foundations for me to be able to set up this program, and for that I'm very grateful. Thank you for tagging along with me on this journey and here's to a future filled with lots of Forest School adventures!
P.S. If you're curious about the programs I'm working on, you can check out my Projects & Programs page.
More Posts
WANT TO GET FOREST SCHOOLED TOO?
Subscribe to my email letters, something special from me to you so we can learn together. Each one is filled with heart-felt stories from the forest, resources you may find useful, and things that hopefully bring a smile too.
Thank you!
© by FOREST SCHOOLED
Created with